
It is critical that you use the correct weight oil. If it is not listed on the oil fill cap, open your owner's manual and find out what the manufacture recommends. Now get out the floor jack, set the parking brake, chock the wheels, and raise one front side of your vehicle enough so you can get under the car and access the oil filter. Warning: (Place jack stands under the area where you have jacked up the vehicle.) That way if the jack fails, which is possible, the stands will prevent you from being crushed underneath the vehicle. It has happened to more than one person working under a vehicle. Have a catch pan or other suitable pan to catch the oil. Locate the oil pan drain plug, located somewhere on the oil pan, which will look something like this. Do not get mixed up and remove the transmission drain plug. The oil drain plug will be located on the oil pan, which is located on the bottom of the engine block.
 Put on a pair of latex gloves or coat your hands with Vaseline to keep toxic oil from contacting your skin and help with cleanup. Remove the drain plug using a boxed end wrench or socket, not an open ended wrench or adjustable wrench, to avoid rounding off the drain plug. Inspect the drain plug washer and replace if necessary. Go a take a break while the oil drains. After all the oil has drained, wipe the area clean, and reinstall the drain plug. Don't forget this step or you will have a big mess. Tighten it snugly but do not over-tighten. Around 20
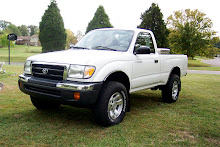
 Ft/Lbs is average if you own a torque wrench. Use common sense and tighten enough to prevent a leak but not enough to strip the threads. If you own an older Honda, I recommend you replace the metal gasket with a 14 mm fiber gasket. Honda's have a bad habit of leaking if not tightened to around 30 lb/ft but if you tighten them that much the pan distorts and they end up leaking eventually anyway. Find the oil filter which will be mounted somewhere on the engine block on most vehicles. Look around everywhere as it is there somewhere. Here is the location of the one on my Toyota Tacoma 4 cyl.

Remove the filter turning counterclockwise. You may need a filer wrench if it was tightened too much. Wipe the mounting surface clean. Critical: Apply oil to the gasket on the new filter. Install the new filter turning clockwise and once the filter touches the mounting base, tighten it 3/4 turn, no more and no less. Over-tighten and it may leak or you may not be able to get it off next oil change. Tighter, is not better, when it comes to oil filters. Now if you vehicle is a newer model GM the filter may not be located in this area. Instead it may be a cartridge filter located on top of the engine. Refer to your owner's manual for the location and procedure to replace those type filters. Usually they are located under a plastic cover. Now the oil is drained and the new filter installed. Get a good clean funnel and pour in the correct amount of oil as listed in your owner's manual. Replace the oil fill cap, and start the engine. Look for any leaks. If none, which there should not be, shut the engine off, remove the jack stands, & lower the jack. Take all your used oil to a recycle center or to the place where you bought the oil. Almost all of them will take your dirty oil for recycling. Please, do not dispose of used oil by pouring it out on the ground. Used oil is very toxic and will contaminate ground water. After the vehicle has sat for about 1 hour check the oil level to make sure you poured in the correct amount. Whatever you do, do not overfill. Overfilling is just as bad a under-filling. Step back and admire a job well done, and you saved money in the process too.

No comments:
Post a Comment
Note: Only a member of this blog may post a comment.